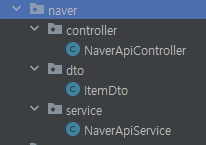
이제 마지막으로 이 프로젝트에서 사용된 네이버 검색 API 를 활용한 부분의 코드이다.
이 부분에 대해서는 강의의 것을 그냥 붙여 사용했다.
앞에서 빼먹은 애플리케이션 실행부 먼저...
MyselectshopApplication
package com.sparta.myselectshop;

import org.springframework.boot.SpringApplication;
import org.springframework.boot.autoconfigure.SpringBootApplication;
import org.springframework.data.jpa.repository.config.EnableJpaAuditing;

@SpringBootApplication
@EnableJpaAuditing
public class MyselectshopApplication {

    public static void main(String[] args) {
        SpringApplication.run(MyselectshopApplication.class, args);
    }

}
NaverApiController
package com.sparta.myselectshop.naver.controller;


import com.sparta.myselectshop.naver.dto.ItemDto;
import com.sparta.myselectshop.naver.service.NaverApiService;
import lombok.RequiredArgsConstructor;
import org.springframework.web.bind.annotation.GetMapping;
import org.springframework.web.bind.annotation.RequestMapping;
import org.springframework.web.bind.annotation.RequestParam;
import org.springframework.web.bind.annotation.RestController;

import java.util.List;

@RestController
@RequestMapping("/api")
@RequiredArgsConstructor
public class NaverApiController {

    private final NaverApiService naverApiService;

    @GetMapping("/search")
    public List<ItemDto> searchItems(@RequestParam String query)  {
        return naverApiService.searchItems(query);
    }
}
ItemDto
package com.sparta.myselectshop.naver.dto;

import lombok.Getter;
import lombok.NoArgsConstructor;
import org.json.JSONObject;

@Getter
@NoArgsConstructor
public class ItemDto {
    private String title;
    private String link;
    private String image;
    private int lprice;

    public ItemDto(JSONObject itemJson) {
        this.title = itemJson.getString("title");
        this.link = itemJson.getString("link");
        this.image = itemJson.getString("image");
        this.lprice = itemJson.getInt("lprice");
    }
}
NaverApiService
package com.sparta.myselectshop.naver.service;

import com.sparta.myselectshop.naver.dto.ItemDto;
import lombok.extern.slf4j.Slf4j;
import org.json.JSONArray;
import org.json.JSONObject;
import org.springframework.http.*;
import org.springframework.stereotype.Service;
import org.springframework.web.client.RestTemplate;

import java.util.ArrayList;
import java.util.List;

@Slf4j
@Service
public class NaverApiService {

    public List<ItemDto> searchItems(String query) {
        RestTemplate rest = new RestTemplate();
        HttpHeaders headers = new HttpHeaders();
        headers.add("X-Naver-Client-Id", "ufC7iCHE1eRqXFSjFmTu");
        headers.add("X-Naver-Client-Secret", "26mXWwGwvw");
        String body = "";

        HttpEntity<String> requestEntity = new HttpEntity<String>(body, headers);
        ResponseEntity<String> responseEntity = rest.exchange("https://openapi.naver.com/v1/search/shop.json?display=15&query=" + query , HttpMethod.GET, requestEntity, String.class);

        HttpStatus httpStatus = responseEntity.getStatusCode();
        int status = httpStatus.value();
        log.info("NAVER API Status Code : " + status);

        String response = responseEntity.getBody();

        return fromJSONtoItems(response);
    }

    public List<ItemDto> fromJSONtoItems(String response) {

        JSONObject rjson = new JSONObject(response);
        JSONArray items  = rjson.getJSONArray("items");
        List<ItemDto> itemDtoList = new ArrayList<>();

        for (int i=0; i<items.length(); i++) {
            JSONObject itemJson = items.getJSONObject(i);
            ItemDto itemDto = new ItemDto(itemJson);
            itemDtoList.add(itemDto);
        }

        return itemDtoList;
    }


}
이렇게 이제 내가 공부중인 백엔드 부분에 대해서만 정리를 했다...
이제 어느정도 이해했으리라 생각하고 과제를 시작하자...
'스파르타 강의 > 스프링 강의' 카테고리의 다른 글
| 스프링 JWT 구현-5 (0) | 2022.12.04 |
|---|---|
| 스프링 JWT 구현-4 (0) | 2022.12.04 |
| 스프링 JWT 구현-3 (0) | 2022.12.04 |
| 스프링 JWT 구현-2 (0) | 2022.12.04 |
| 스프링 JWT 구현-1 (0) | 2022.12.04 |

